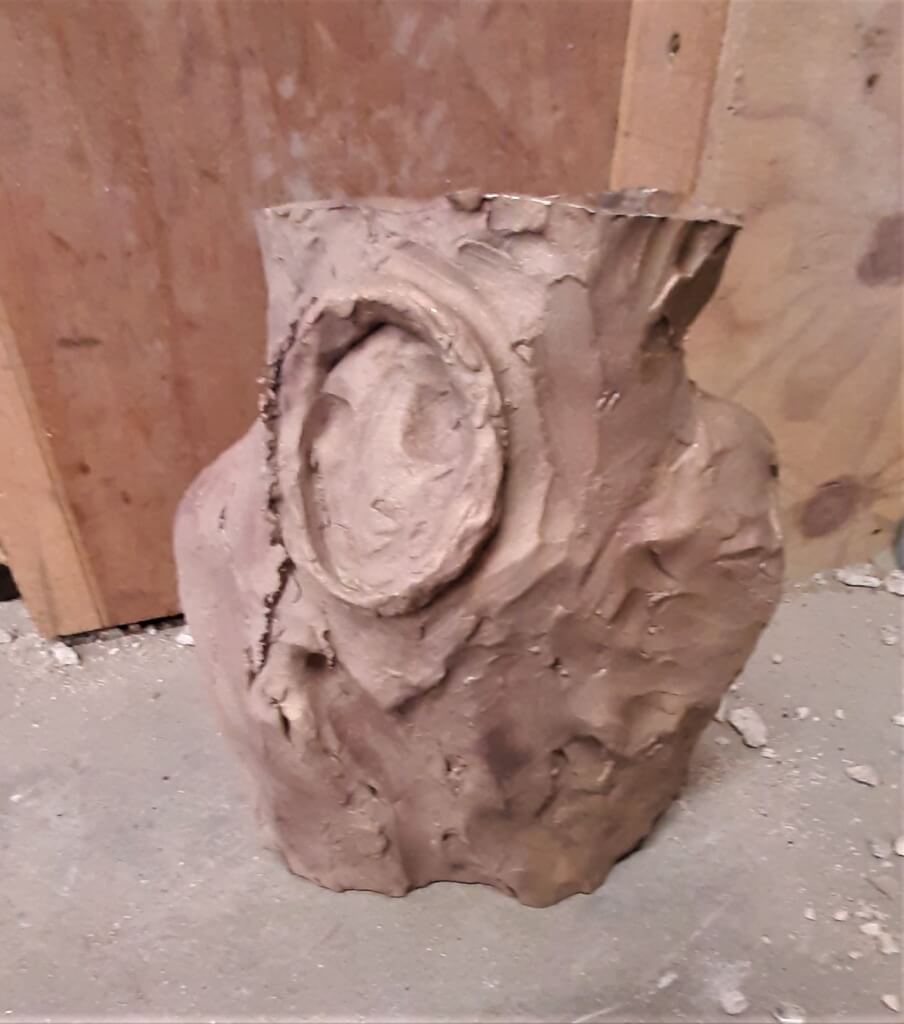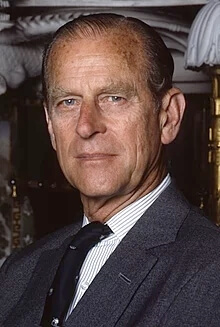
Tribute to HRH Prince Philip, Duke of Edinburgh

Tribute to HRH Prince Philip, Duke of Edinburgh

HANDS IN PRAYER

 for

The Icorec Trust
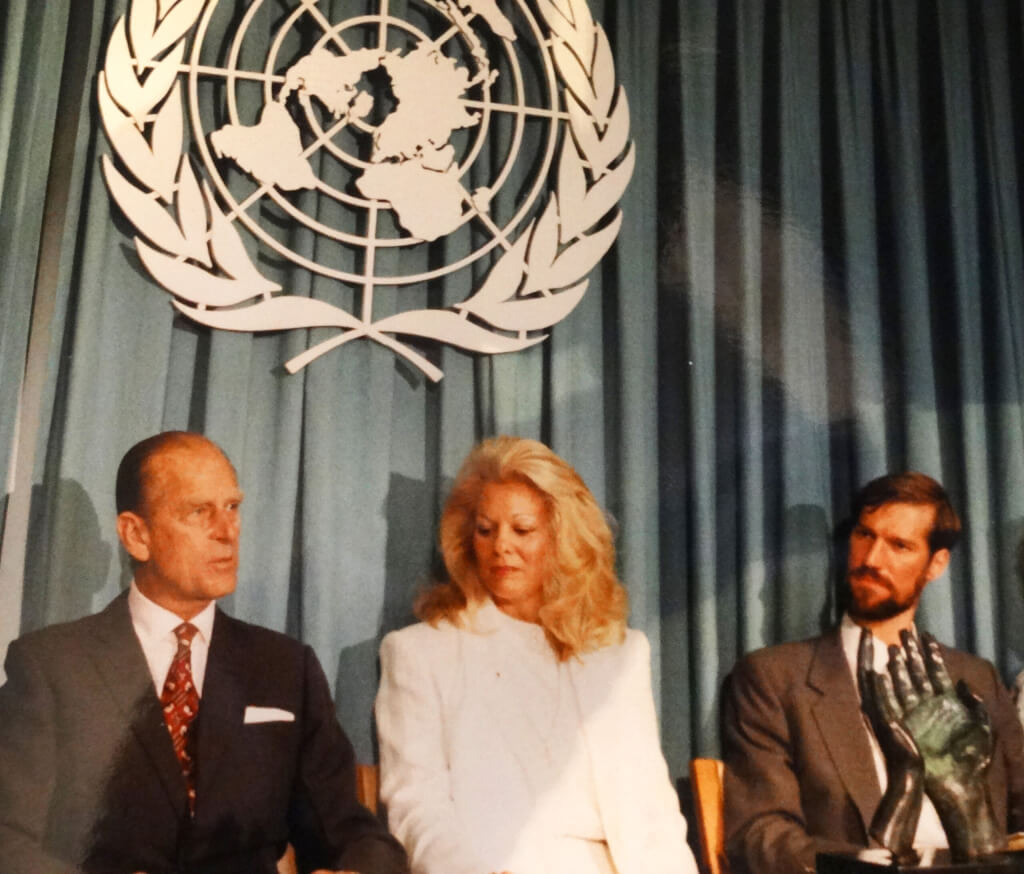
HRH Prince Philip Duke of Edinburgh (left) at the UN in New York to present bronze sculpture Hands in Prayer. UN logo above.

 HRH Prince Philip, Duke of Edinburgh inside the UN, about to present the Hands in Prayer sculpture (bottom right) on behalf of the Icorec Trust.

I was approached in London by Shelley Vaughan Williams who asked if I would cast a bronze sculpture of hands in prayer.  It was to be used as an annual award for religious literature, given by The Icorec Trust. The first year, it was to be presented by HRH The Duke of Edinburgh in the Security Council Chamber of the United Nations building, in New York. The Icorec Trust was formed to promote multi-racialism and religious tolerance.

I duly carved and cast the sculpture and flew it to New York for this auspicious occasion.  I was privileged to be invited to the event and was later interviewed about it on UN Radio.

UN Logo in blue on white

After the sculpture presentation, and all the speeches were over, we were all treated to a private lunch.  I was introduced to Prince Philip, who had generously flown to New York from London specifically for this presentation.

I am writing this on the day after his funeral, some 28 years later, a memorable day, when the nation mourned the loss of this amazing man.
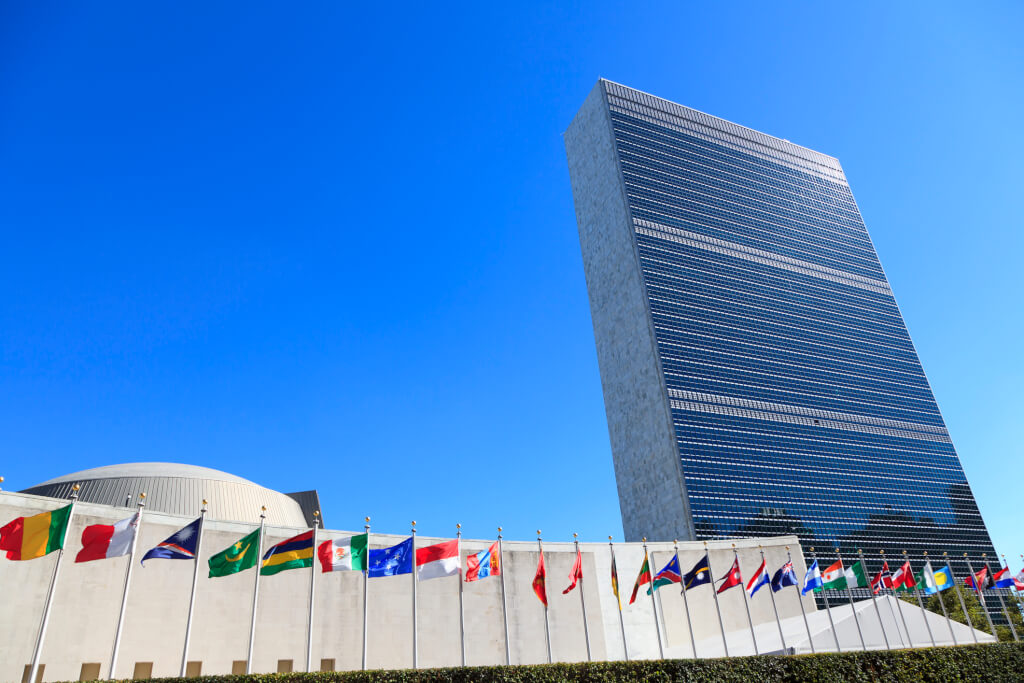
The United Nations Headquarters in New York, flags flying in a row in front. A brilliant blue sky behind and bright sunshine.

You may have noticed that I have made another similar work to this one which is called Please Speak to us of Prayer, in the Gibran Sculpture Series.  They are similar, but quite distinct.  This one, has the palms facing upward, and the other with the palms facing together.  I feel both are representative of prayer and I’m proud of them both!

Speak to us of Freedom – Final assembly

Speak to us of Freedom – Final assembly

The Gibran Sculpture Series


So we now have the main components assembled, but not yet the complete sculpture.
Here we’ll show you the final assembly.

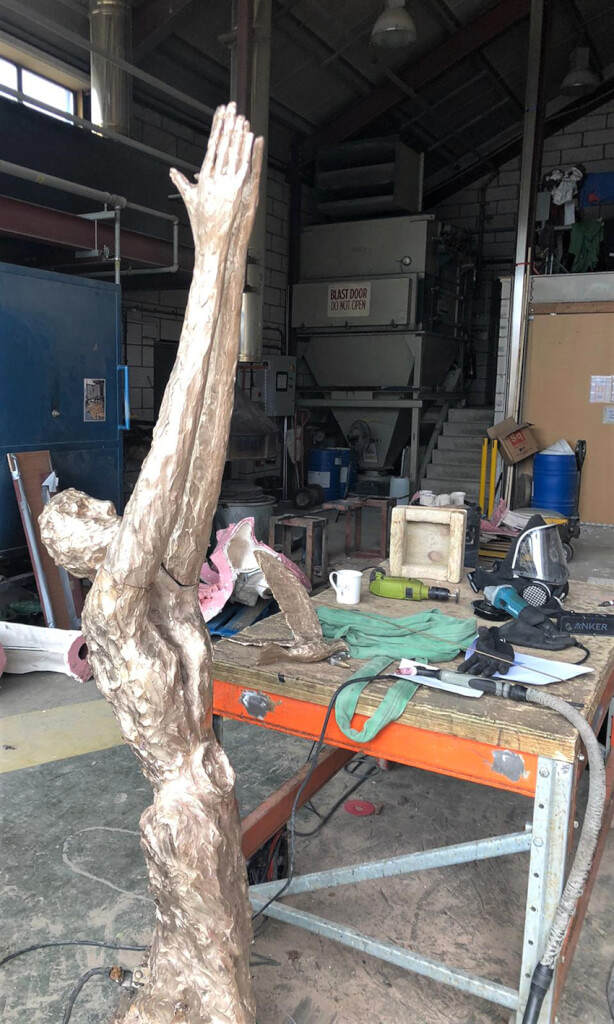
Bronze sculpture, Speak to us of Freedom in workshop awaiting arms to be attached.

This is the bronze sculpture, Speak to us of Freedom in the foundry.  The statue has finally been placed in a standing position and the arms have been loosely, but accurately positioned. The next step is to weld the arms to the torso.  The dove is lying on the workbench behind.

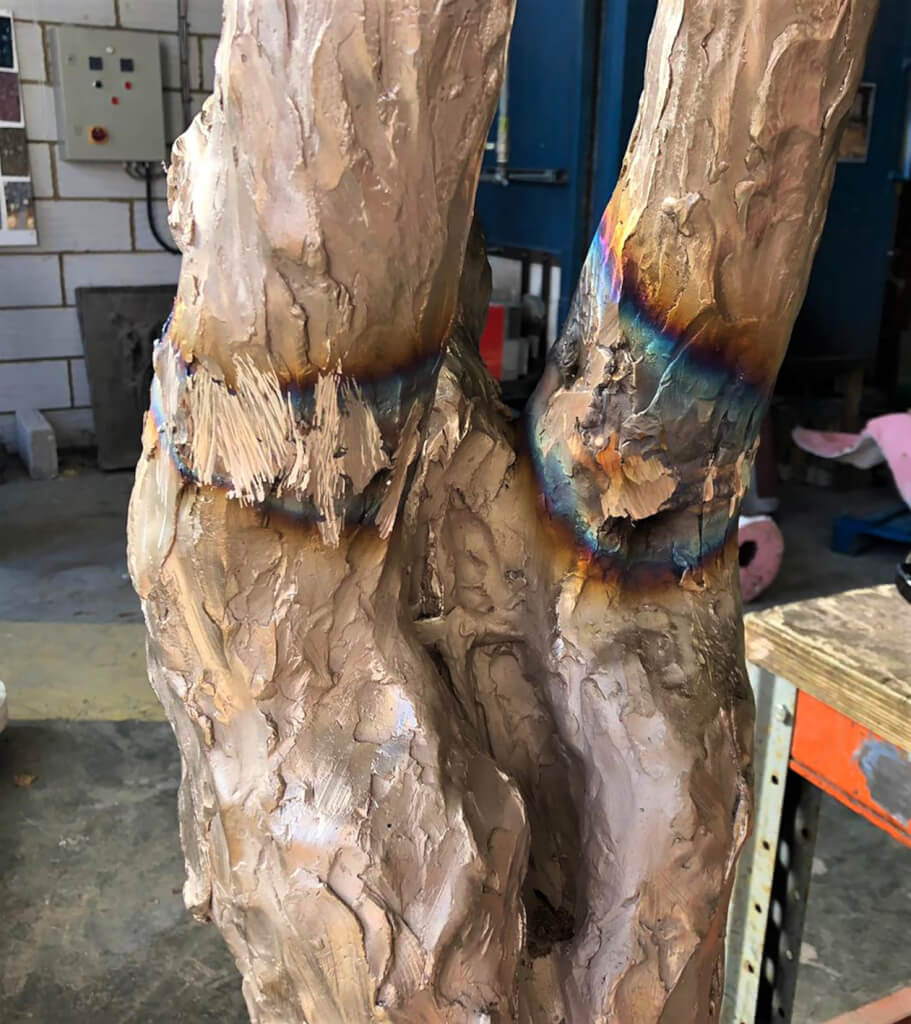
Close up of torso and upper arms of Speak to us of Freedom in the foundry. Welding complete and excess weld metal removed.

This is a colour close up of the torso and upper arms of Speak to us of Freedom in the foundry. Welding is complete and any excess weld metal has been removed.

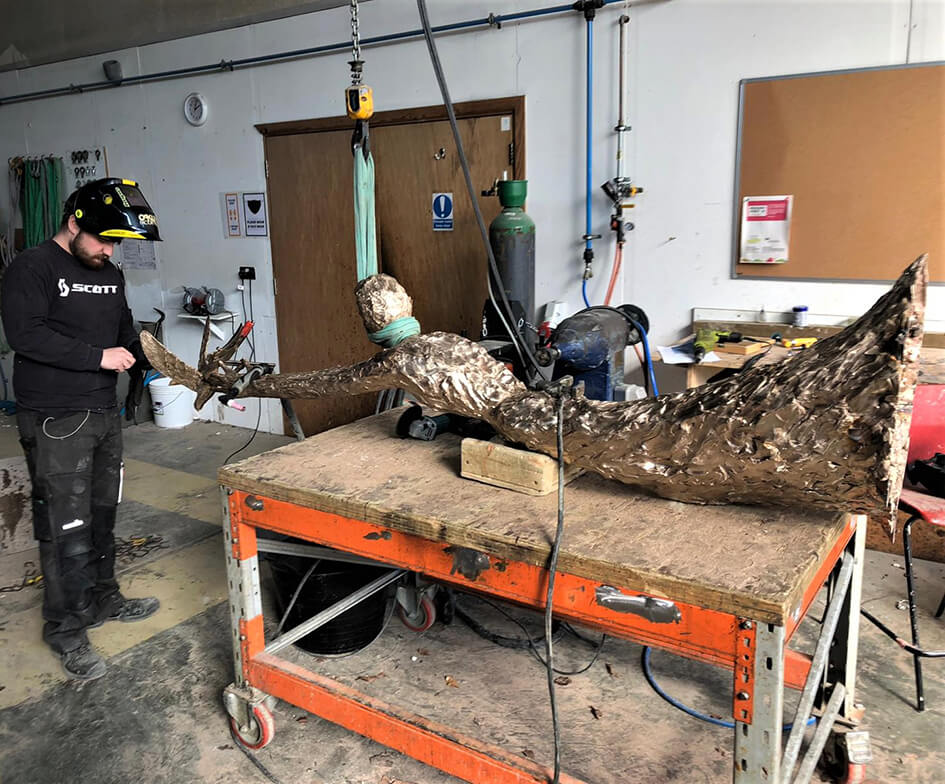
Speak to us of Freedom lying on her stomach on a bench in the foundry. The dove is being positioned and clamped for welding.

This colour photo shows Speak to us of Freedom lying on her stomach on a bench in the foundry. The dove is being positioned and clamped for welding.

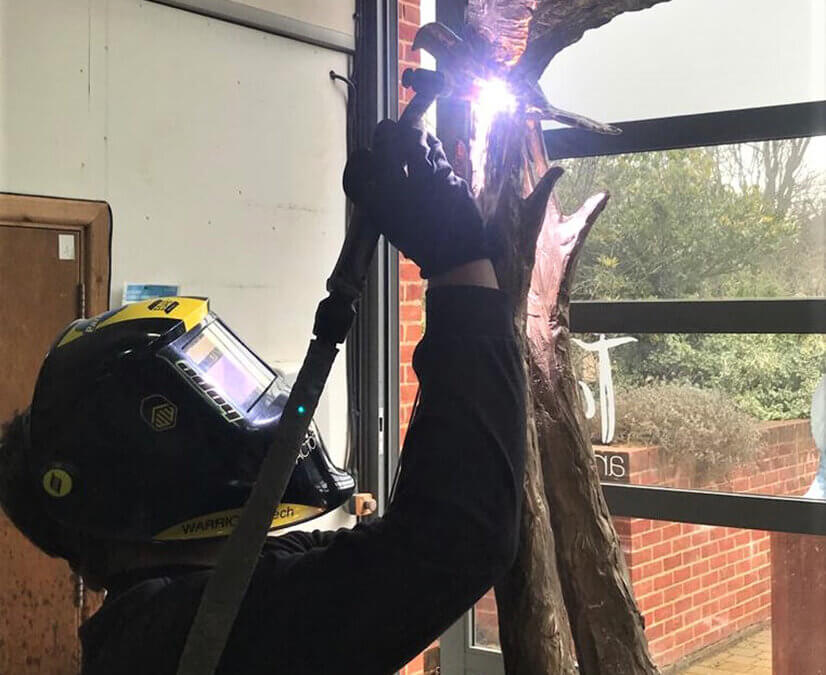
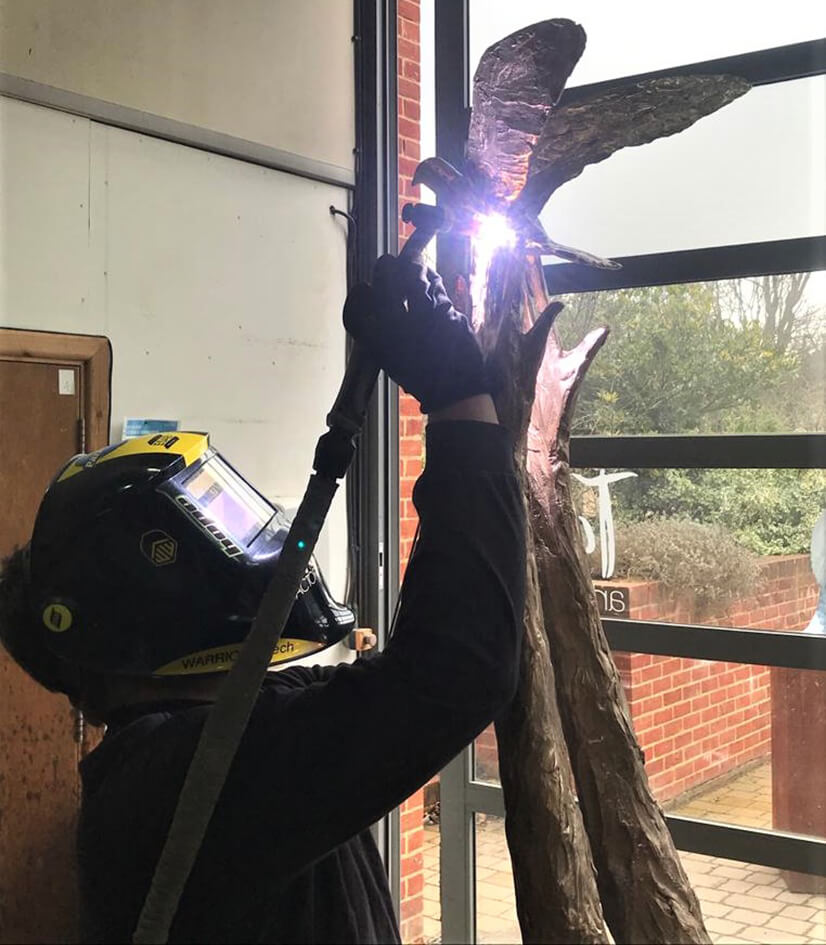
Argon welding the dove to the top of the Speak to us of Freedom bronze sculpture in the foundry.

Argon welding the dove to the top of the Speak to us of Freedom bronze sculpture in the foundry.  The argon cylinder can be seen in the background up against the back wall.

Speak to us of Freedom – final assembly

The very last step!

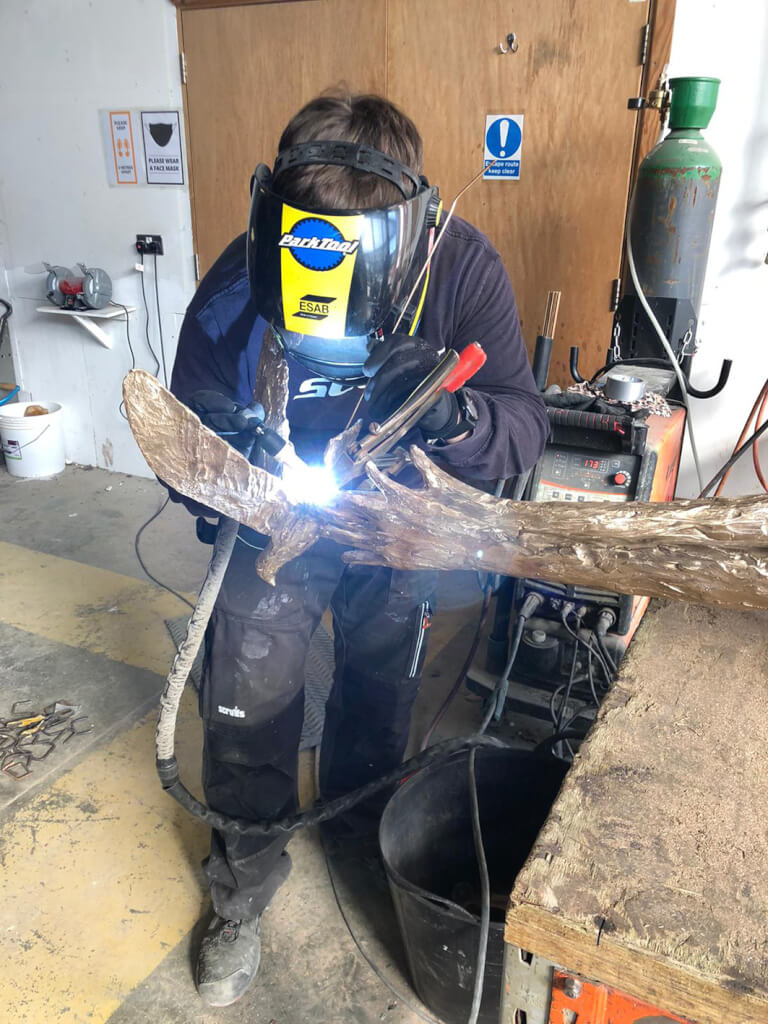
Speak to us of Freedom. The final weld for the dove. Sculpture is standing upright, facing left. Welder to left, facing.

The final welding work being carried out on Speak to us of Freedom. The welder is facing the sculpture which is finally standing on its base. He is welding the dove to the hands of the sculpture.

Next… patination…

See the finished Speak to us of Freedom sculpture here.

Speak to us of Freedom – Assembly begins

Speak to us of Freedom – Assembly begins

The Gibran Sculpture Series


Here we are, weeks down the line and many, many steps, and we still haven’t seen anything that’s recognisable as the original clay sculpture yet.  This is where it starts to come together at last!

To remind you, this is what we are starting with…

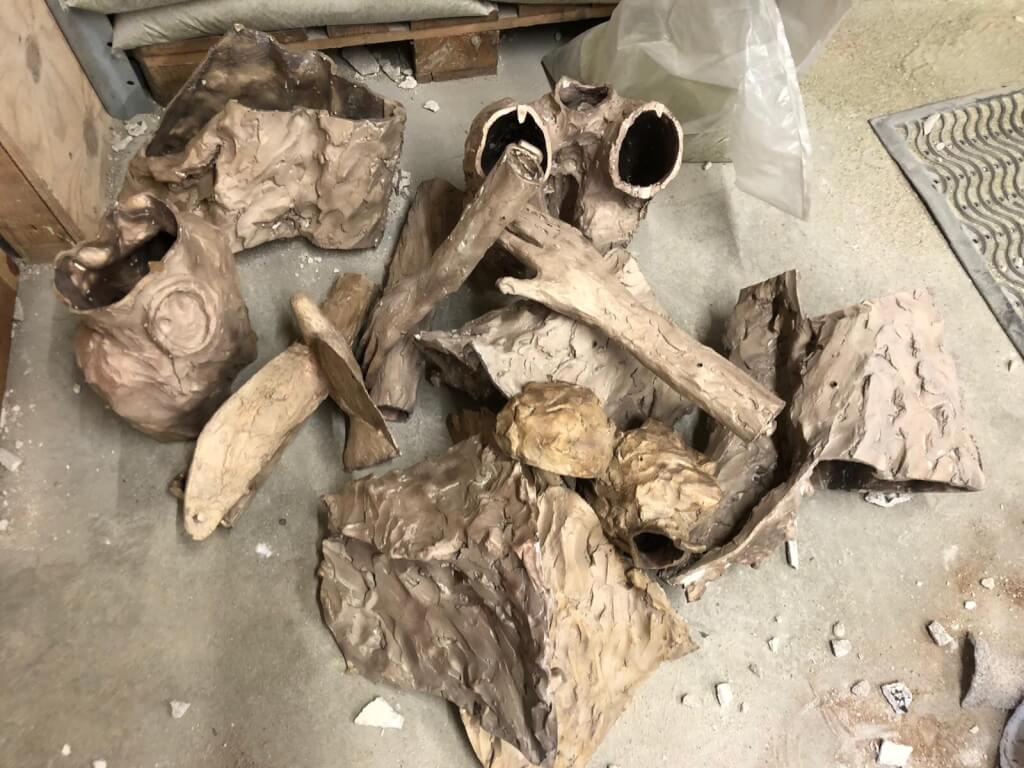
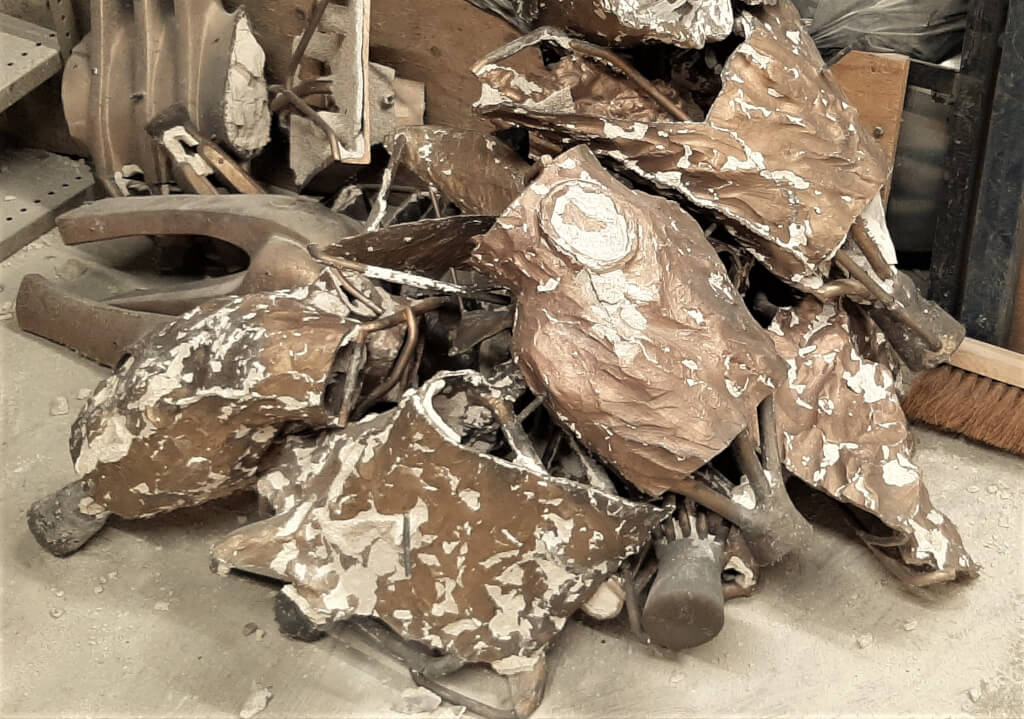
This is a colour photo of some of the individual castings that go to make up the finished bronze sculpture. They are resting on the floor of the workshop in a jumbled pile. Some of the pieces are identifiable such as the hands, the dove, the waist and the upper torso and upper arms, but the rest are incomprehensible!

Some of the components of Spirit of Freedom in a pile on the floor.

The assembly process…

To assemble the complete sculpture, the individual cast components need to be ‘glued’ together.  This is done with a two-step argon welding process.  Two castings are put together so that their edges meet as closely as possible.  The fit ought to be very close to perfect, because after all, that’s how the castings were made in the first place.  Then they are spot welded just to hold them together mechanically while the ‘seam’ or ‘join’ is finished by a continuous weld to give the greatest strength as well as making the join invisible.

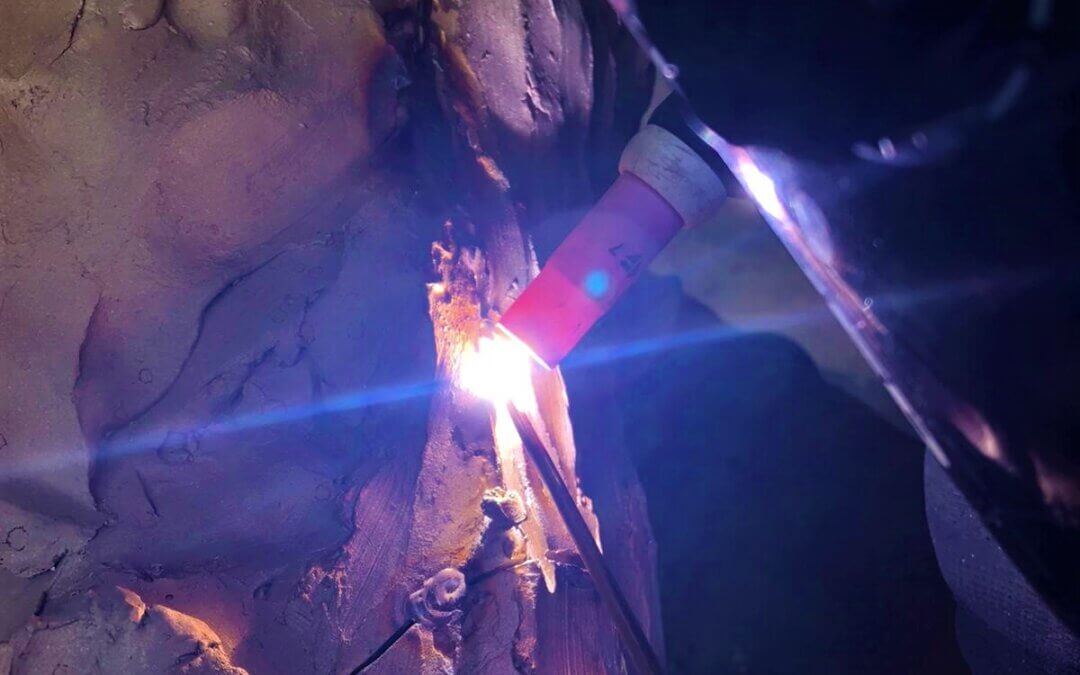
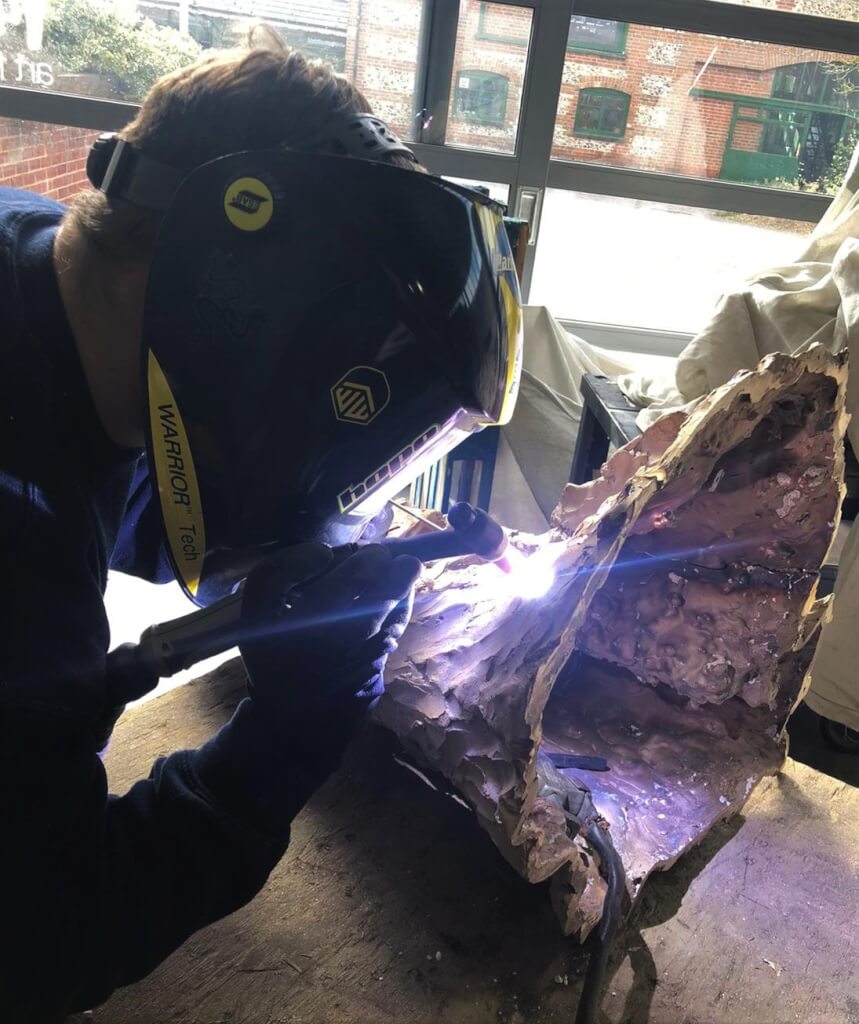
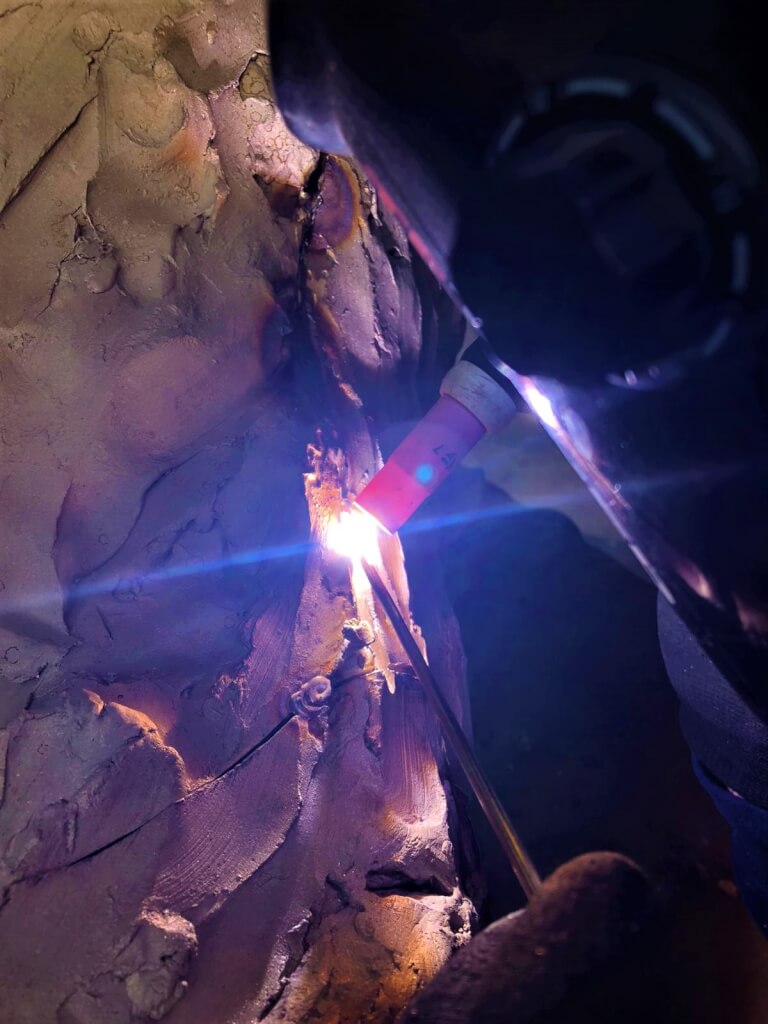
In the photo below, you can see a thin, snaking gap between two sections.  The welding torch and the rod are being used to create a continuous weld all along the joint.

Just below them you can see a spot weld, holding the two pieces together.

This is a colour photo showing the start of the assembly process. Individual castings have been fitted together and then spot welded to hold them in place. This photo shows the bottom section of the sculpture having the joints continuously welded to hide the join between the castings. The sculpture is resting on a workbench in the workshop. The base of it is facing down and to the right. The craftsman is standing to the left of the bench holding the welding gun in his right hand and the welding rod in his left. he is bent over the piece, wearing a full-face protective helmet. The background is the windows of the workshop and another flint-and-brick, single storey building across a small courtyard.

Here, individual castings have been fitted together and then spot welded to hold them in place. This photo shows the bottom section of the sculpture having the joints continuously welded to hide the join between the castings. The sculpture is resting on a workbench in the workshop. The background is the windows of the workshop.

This is a colour photo showing the start of the assembly process. Individual castings have been fitted together and then spot welded to hold them in place. This photo is a close up of the continuous welding process. It shows two sections of the sculpture being continuously welded to hide the join between the castings. The craftsman is standing on the right of the picture. His left hand is at the bottom right of the picture holding the welding rod which seems to be pointing upwards towards the heat. His full-face protective helmet fills the right-hand edge of the photo. A little below the current welding focus you can see a small spot weld which is holding the castings in place until they are fully continuously welded.

This photo is a close up of the continuous welding process. It shows two sections of the sculpture being welded to hide the join between the castings. In case you can’t work out what you are looking at, the craftsman is standing on the right of the picture. His left hand is at the bottom right of the picture, holding the welding rod which appears to be pointing upwards towards the heat. His full-face protective helmet is filling the right-hand edge of the photo. A little below the current welding focus, you can see a small spot weld which is holding the castings in place until the continuous weld is complete.

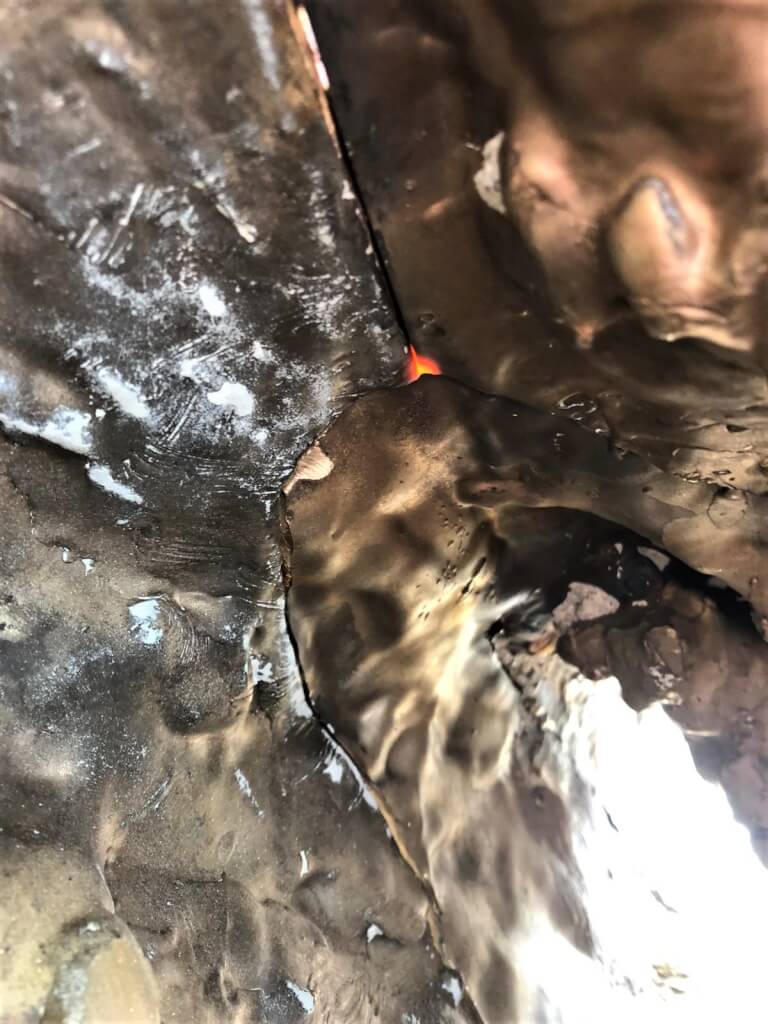
This is a close-up colour photo of the inside of the base of the sculpture. It shows three castings which have been welded together. In simple terms, there is a large casting that runs from top to bottom of the left hand side of the picture and then two others held against it, one top right and the other bottom right. There is a red-hot heat spot where the three edges meet in the centre of the picture. Daylight is flooding into the cavity of the sculpture from the bottom right of the picture.

This is a close-up of the inside of the base of the sculpture.  It shows three castings which have been welded together. There’s a large casting that runs from top to bottom of the left hand side of the picture and then two others held against it, one top right and the other bottom right. There red-hot heat spot is where the three edges meet in the centre of the picture. Daylight is flooding into the cavity of the sculpture from the bottom right of the picture.

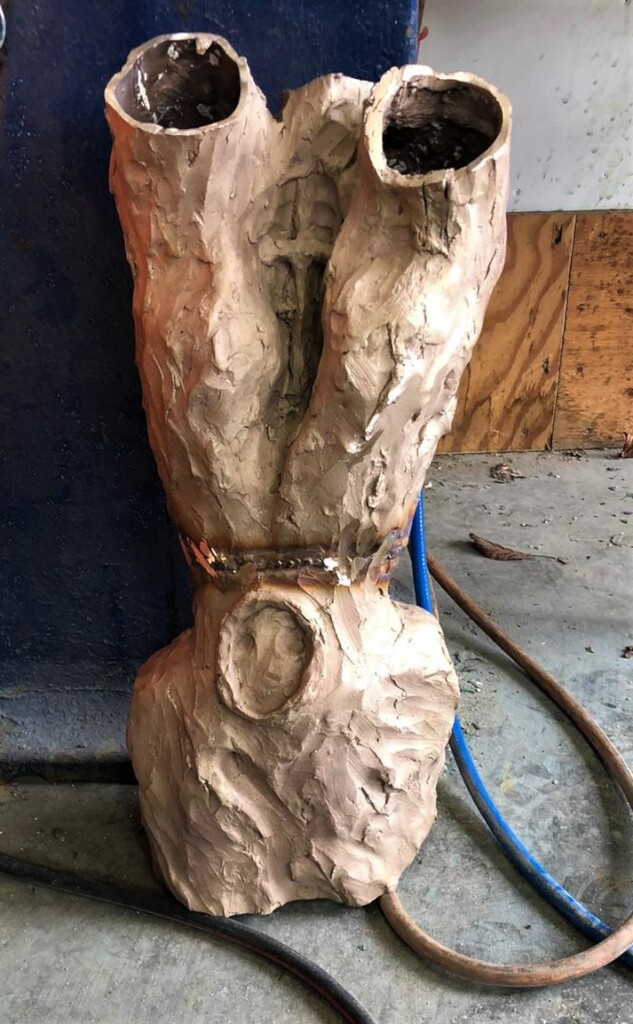
This colour photo shows the mid-section of the sculpture fully assembled and welded. This section is the piece between the bottom of the neck and the very tops of the raised arms down to the bottom of the torso. It is propped up, resting on the floor of the workshop with oxygen, acetylene and argon rubber welding hoses. It is a very pale bronze colour at this stage of the process with a brighter, hooped line where the joint across the waist has been continuously welded.

This photo shows the mid-section of the sculpture fully assembled and fully welded. This section is the piece between the bottom of the neck and the very tops of the raised arms down to the bottom of the torso. It is propped up,  on the floor of the workshop with oxygen, acetylene and argon rubber welding hoses. As you can see, it is a very pale bronze colour at this stage of the process.  The brighter, horizontal hooped line is where the joint across the waist has been continuously welded.

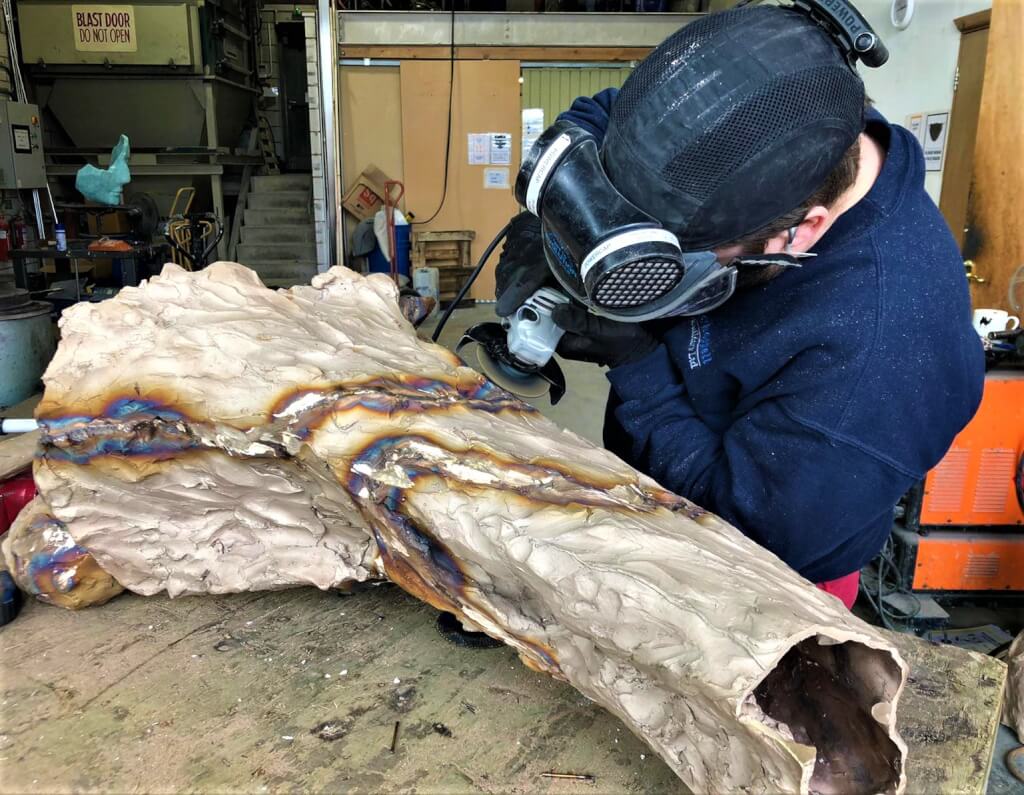
This is a colour photo of the bottom half of the sculpture resting on its side on the bench in the workshop. This section is the section from the feet or base to the tops of the thighs. The assembly of this section is complete and a specialist is now removing any excess metal left over from the welding process to ensure that the complete assembly matches the original wax and clay sculpture. The operator is standing behind the bench facing towards us and to our left holding an angle grinder that he is applying to the sculpture. He is wearing a navy blue coloured sweatshirt and a helmet with full face visor and two circular air filters. His head is tipped towards us so that we see the top of the helmet. Behind him is the back wall of the foundry, with a furnace on the far left and behind that a large galvanised hopper with, to its right, a set of concrete steps going up.

This is the bottom half of the sculpture resting on its side on the bench in the workshop. This section is the section from the feet, or base, to the tops of the thighs. The assembly of this section is complete and a specialist is now removing any excess metal left over from the welding process to ensure that the complete assembly matches the original wax and clay sculpture.

The operator is using an angle grinder. Behind him is the back wall of the foundry, with a furnace on the far left and behind that a large galvanised hopper with, to its right, a set of concrete steps going up.

See the finished Speak to us of Freedom sculpture here.

Speak to us of Freedom – Fettling Gallery

Speak to us of Freedom – Fettling Gallery

The Gibran Sculpture Series


I’ve had a great response to the photos from the foundry, so I thought I’d let you see some more.  These photos show you the amazing skill, but also the huge amount of work, that goes into the making of these fine art bronze sculptures.  Sometimes I think we sculptors have it easy!

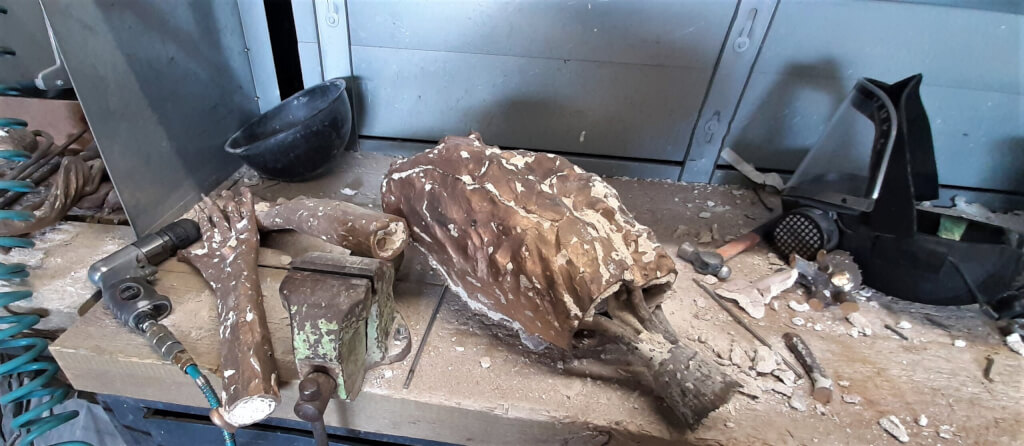
This colour photo shows components of a bronze sculpture resting on a workbench in a workshop, with a compressed-air drill, connected to a spiral supply hose and a vice mounted to the bench. The sculpture components have been removed from their moulds, but still have bits of mould attached to them as well as the casting runners and pouring funnels used to get the molten metal where it needs to be. To the far back right of the bench is a protective helmet and visor with circular breathing filters attached and a large hammer. There are two forearms with hands attached that still have moulding clay inside the otherwise hollow arms.

Some of the components of Speak to us of Freedom on a workbench in the workshop.

What on earth am I looking at?

To the left, there’s a compressed-air drill which is connected to a spiral supply hose.  That’s used for cleaning.  Next to that is a vice, mounted to the bench.  Round the vice are the cast  bronze components.  They have been removed from their moulds, but they still have bits of white clay mould attached to them.

As well as the bits of investment material, they still have the solidified bronze casting runners and pouring funnels attached.  These are used in the casting process to get the molten metal where it needs to be.

Then there are two bronze forearms, including hands.  They still have the white investment material inside.  The arms on the original sculpture are solid of course, but are designed to be hollow when they’re turned into bronze.  To make them hollow, the mould has to be filled with something else before the molten bronze is poured, otherwise they won’t be hollow!  Clay investment material is what is used, and that stays there until such time as it’s removed.

Next, these cast bronze components need to be cleaned before anything else can be done to them.

The individual components

A section of skirt…

This is a colour photo of the waist section of the bronze. It is resting on a workbench in the workshop and is flecked with bits of white clay that are the remains of the mould in which it was cast. It is awaiting cleaning to have those bits removed before progressing to the next stage of production.

Here is a section of the skirt. It is resting on a workbench in the workshop and is flecked with bits of white investment material that are the remains of the mould in which it was cast. It is waiting to be cleaned which will remove those bits completely.

The left hand and forearm…

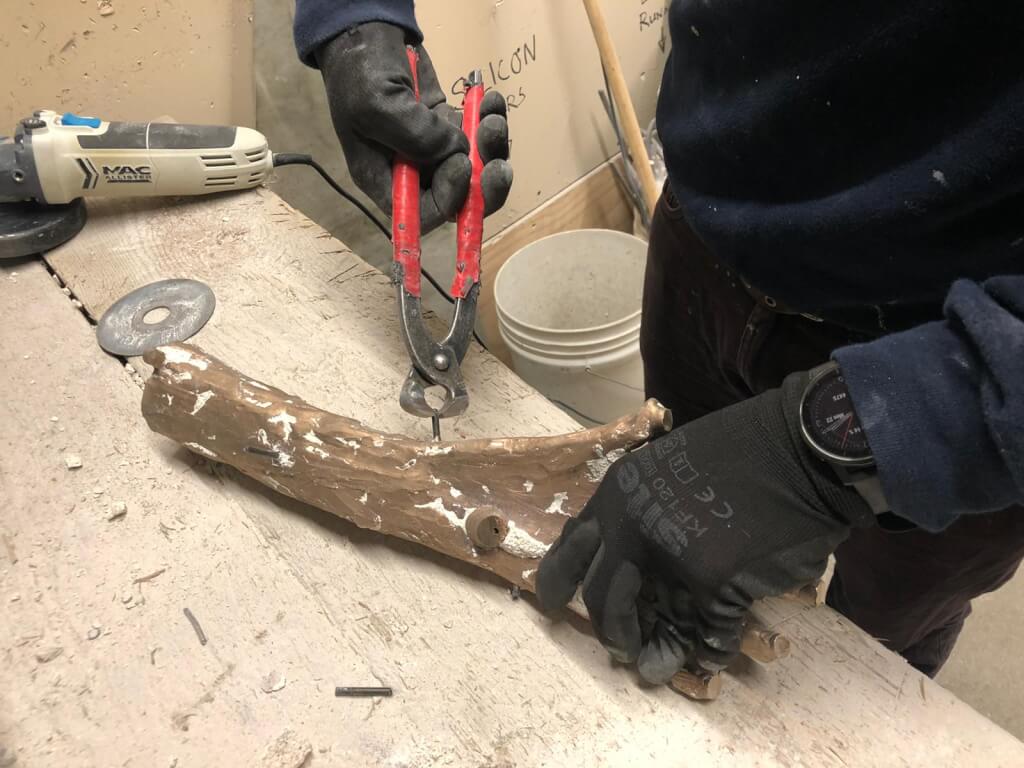
Colour photo of a foundryman working on a casting. The casting is of the left forearm and hand. It is resting on a workbench in a workshop. The man is holding it in a left-handed handshake and is removing one of the feeders or risers used during casting, wearing black protective gloves, with a pair of end-cutting pliers with red-coated handles. There is a mains-powered angle grinder on the bench at the top left of the picture.

This is the casting of the left forearm and hand.  The foundryman is removing one of the feeders or risers used during casting.

The upper torso, shoulders and top of the upper arms…

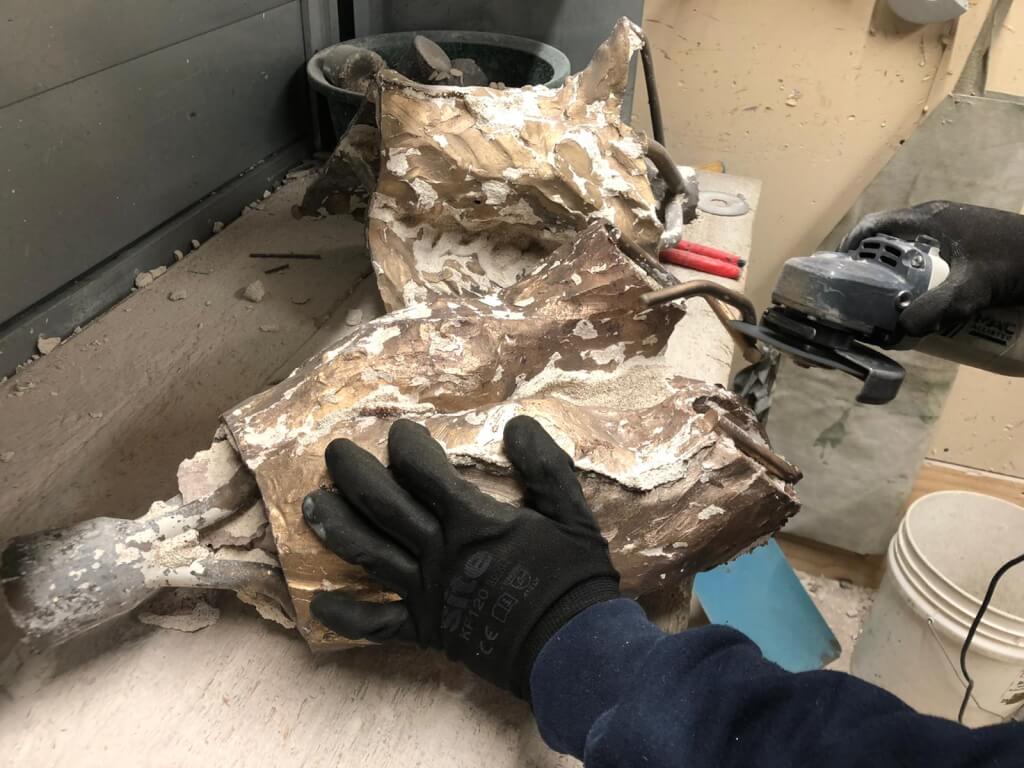
Colour photo of a foundryman working on a casting. The casting is of the top of the torso and the tops of the upper arms. It is resting on a workbench in a workshop. The man is removing one of the feeders or risers used during casting, wearing black protective gloves, and an angle-grinder. The casting still has a considerable number of flecks of white clay mould adhering to it and to the left of the picture are the filler and feeders, still attached.

This casting is of the top of the torso and the tops of the upper arms. The foundryman is removing one of the runners or risers used during casting.  The flecks are bits of white investment material from the mould.  When he’s finished fettling (cutting off the unwanted pieces of bronze), he’ll clean them off as the next job.  To the left of the picture are the pouring funnel and runners or feeders, still attached.

The Dove of Peace…

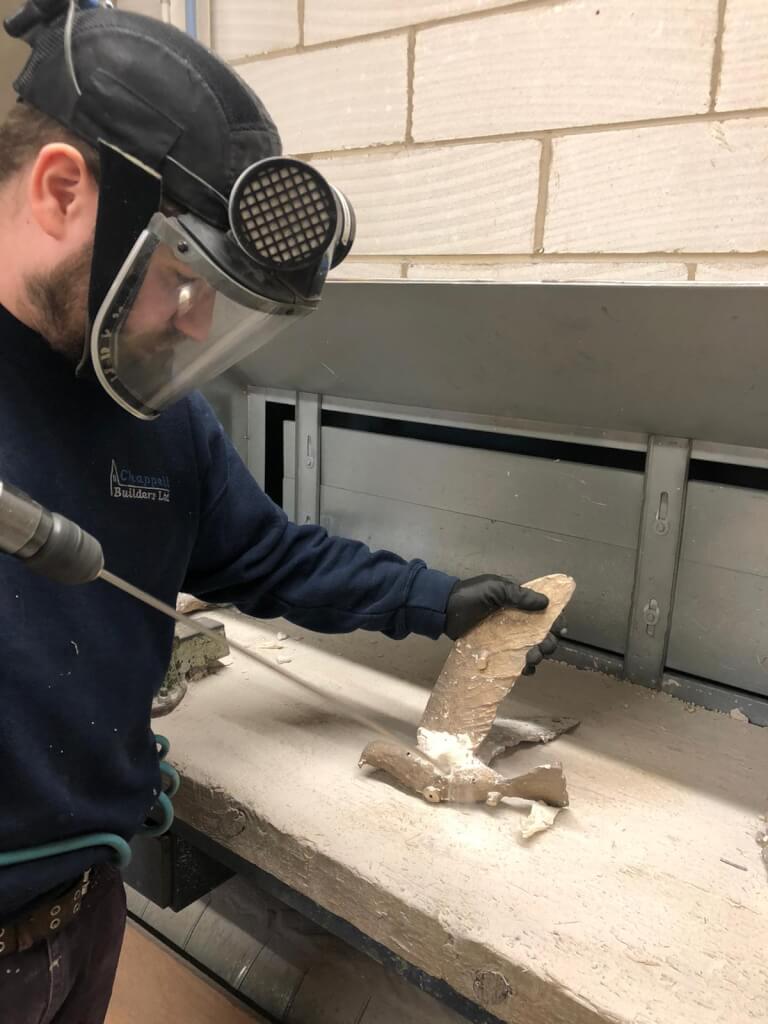
This is a colour photo of the Dove of Peace from the bronze sculpture being cleaned after casting. It is resting on a workbench in the workshop on its right wing with the underside of the left wing facing the camera. The bottom of the wing, where it meets the body, looks white, while the rest of the casting is a golden bronze. The white is the remains of the moulding clay still sticking to the casting. The foundryman is cleaning the clay off using a drill with a suitably abrasive attachment on a long shaft. The bearded man is standing to the left of the bench, wearing a navy sweatshirt and a protective helmet with a clear plastic visor and a circular breathing filter.

This is the Dove of Peace from the bronze sculpture.  It is being cleaned after casting.  It is resting on its right wing, with the underside of the left wing facing the camera.
The bottom of the wing, where it meets the body, looks white, while the rest of the casting is a golden bronze. The white is the remains of the investment plaster still sticking to the casting. The foundryman is cleaning the material off, using a drill with a suitably abrasive attachment on a long shaft.

The right hand and forearm…

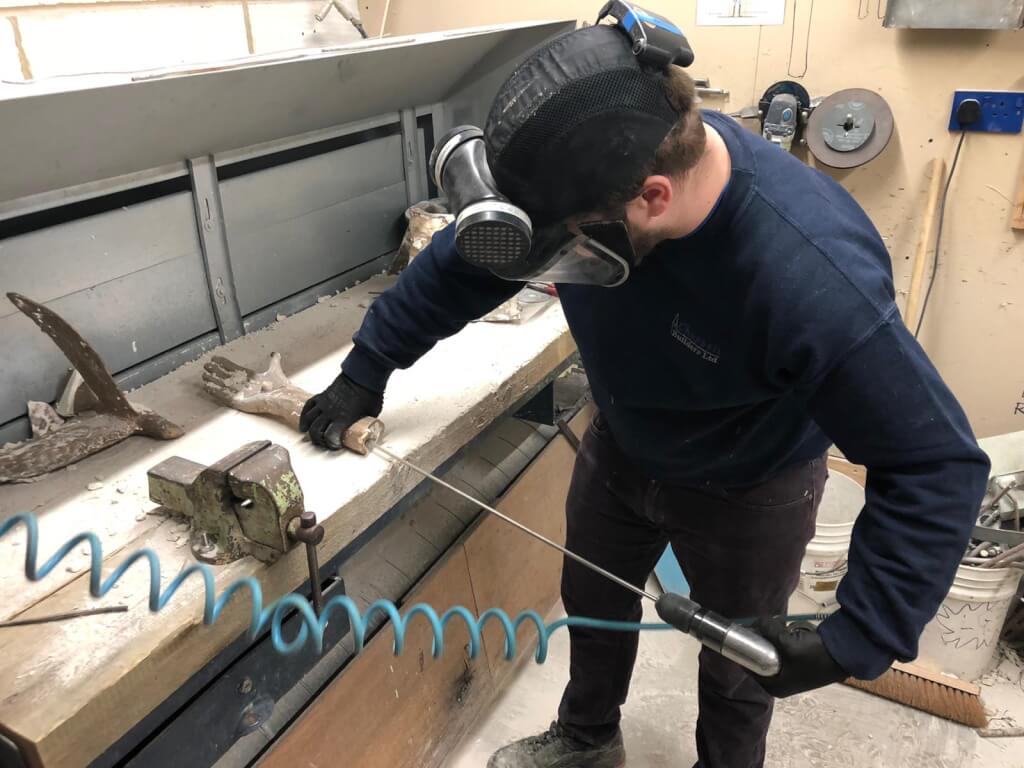
This is a colour photo of the right hand and forearm of the bronze sculpture being cleaned. The casting is resting horizontally and palm up on a workbench in the workshop. A foundryman is standing to the right of the bench facing towards us to the left. He is holding the casting down on the bench with his right hand and using a compressed-air drill with an abrasive tool on a long shaft with his left hand. He is using the tool to remove the moulding clay from the inside of the casting to prepare it for the next stage in the process. The man is wearing a navy sweatshirt, dark jeans and workboots and also a protective helmet with a clear plastic visor and circular breathing filter.

Here is the right hand and forearm of the bronze sculpture. It is being cleaned. The casting is resting horizontally and palm up. A foundryman is using a compressed-air drill to remove the investment plaster from the inside of the casting to prepare it for the next stage in the process.

A section of skirt…

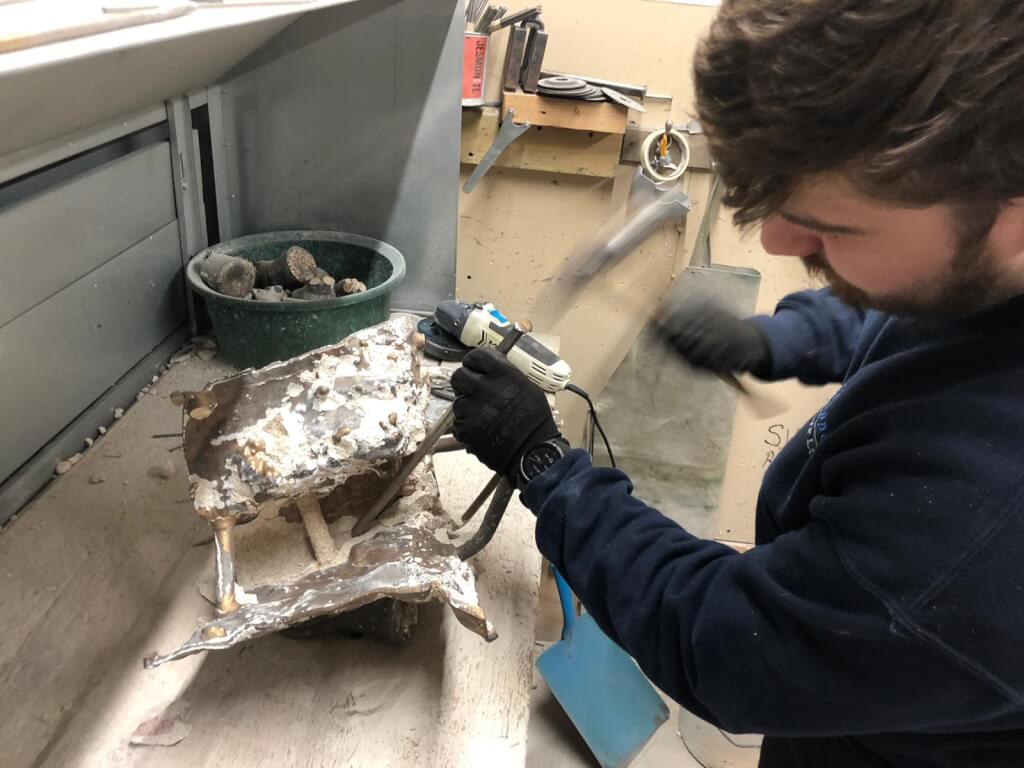
This is a colour photo of a foundryman removing internal bits of the mould left after casting. He is using a hammer and chisel to separate the bits of fine white clay mould that remain. They all need to be removed before the individual castings can be assembled. Behind the casting on the bench, in a large round green bowl, are pieces of castings used during casting itself, but no longer needed and so have been removed. The man is standing to the right of the bench on the right of the photo. He is wearing a navy sweatshirt and he has a beard. The paler blue rectangle at the bottom in the middle is a blue-painted spade to shovel the discarded clay away.

This is a foundryman removing internal bits of the mould left after casting. He is using a hammer and chisel to separate the bits of fine white investment material that remain. They all need to be removed, before the next stage. Behind the casting on the bench, in a large round green bowl, are pieces of castings used during casting itself, but no longer needed. They have been cut off to leave just the original sculpture shape.

All these waste pieces will be melted down and used again.  It may not be gold or silver, but bronze is an expensive alloy and precious, so it is important not to waste it!

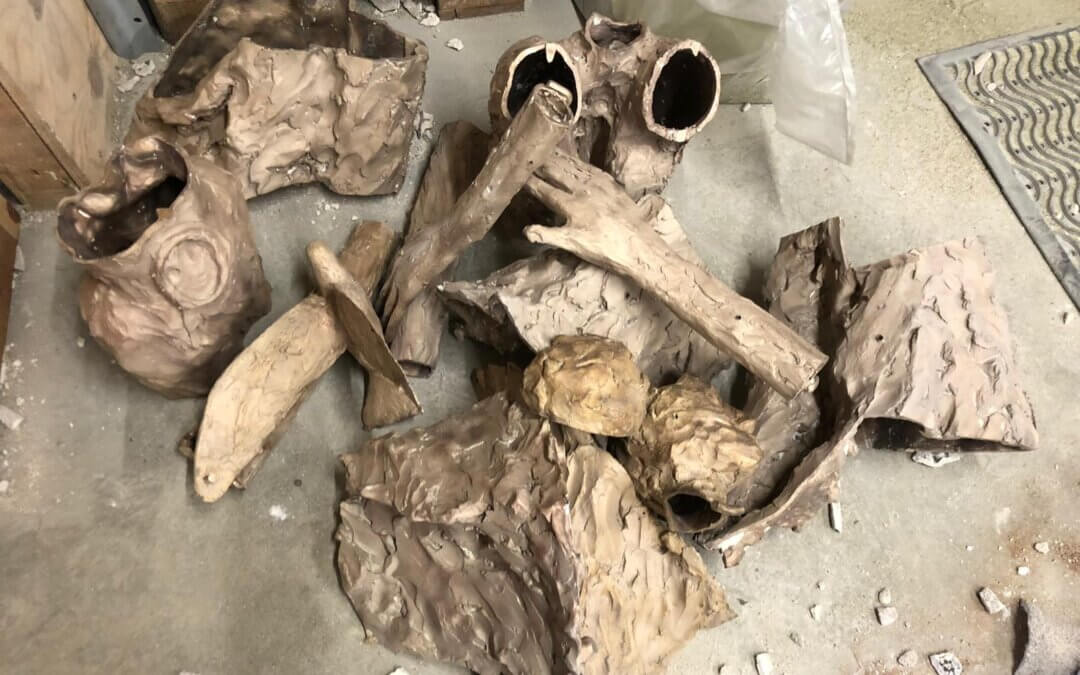
Lots of bits!

This is a colour photo of some of the individual castings that go to make up the finished bronze sculpture. They are resting on the floor of the workshop in a jumbled pile. Some of the pieces are identifiable such as the hands, the dove, the waist and the upper torso and upper arms, but the rest are incomprehensible!

Here are some of the individual castings that go to make up the finished bronze sculpture. They are resting on the floor of the workshop in a jumbled pile. Some of the pieces are identifiable such as the hands, the dove, the waist and the upper torso and upper arms, but the rest are incomprehensible!

All of this work, and we still haven’t got a recognisable outline of the finished sculpture!

More as it happens!

See the finished Speak to us of Freedom sculpture here.

Speak to us of Freedom – Knockout, Fettling, Cleaning & Linishing

Speak to us of Freedom – Knockout, Fettling, Cleaning & Linishing

The Gibran Sculpture Series


In the last post, you saw the castings being poured.  There’s something really quite primeval about the process I feel, with intense, raw heat and red hot molten metal.  Anyway, once the whole thing has cooled, the castings, still in their moulds are removed from the casting box.  If the castings were coarse and with a crude finish, they would simply be ‘knocked out’ of their crude sand moulds, but these are fine art castings and the surface is all important.
So, now they are cool, the castings are removed from the box in their moulds.  The plaster moulds are carefully knocked off the castings by hand.  So the castings, at this stage, end up looking like this…

Knockout is the term used to describe the separation of the casting from its mould. This photo shows the raw castings, having had the bulk of the moulding material removed. The pieces look very strange because the runners and risers, leaders, followers and sprues are all still attached.

The cooled castings, having had their moulds removed and awaiting fettling.

Speak to us of Freedom – knockout

Knockout has nothing to do with boxing!  It is the term given to the process of removing, or knocking out, the castings from their moulds.  The photo above shows the individual castings having had the moulds removed.  They still have their runners and risers, sprues and followers (all the extra bits needed inside the mould to make the metal flow) still attached though.  (These are the bits that look a bit like tree roots).  The next stage is to ‘fettle’ these unwanted bits of bronze off, leaving just the raw castings, albeit with some little bits of mould still attached.

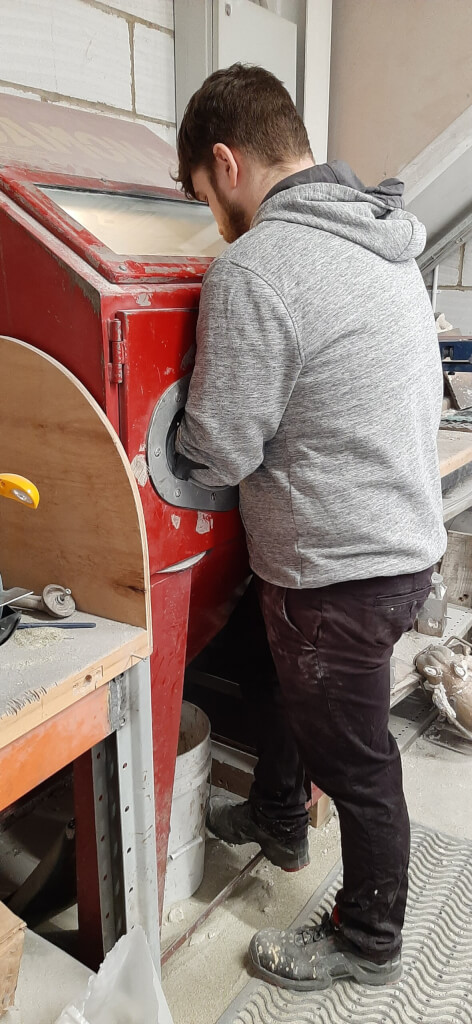
A casting getting a final clean to remove any last traces of the mould that may have been clinging to it.

The final cleaning in the sand-blaster to remove all the last traces of mould.

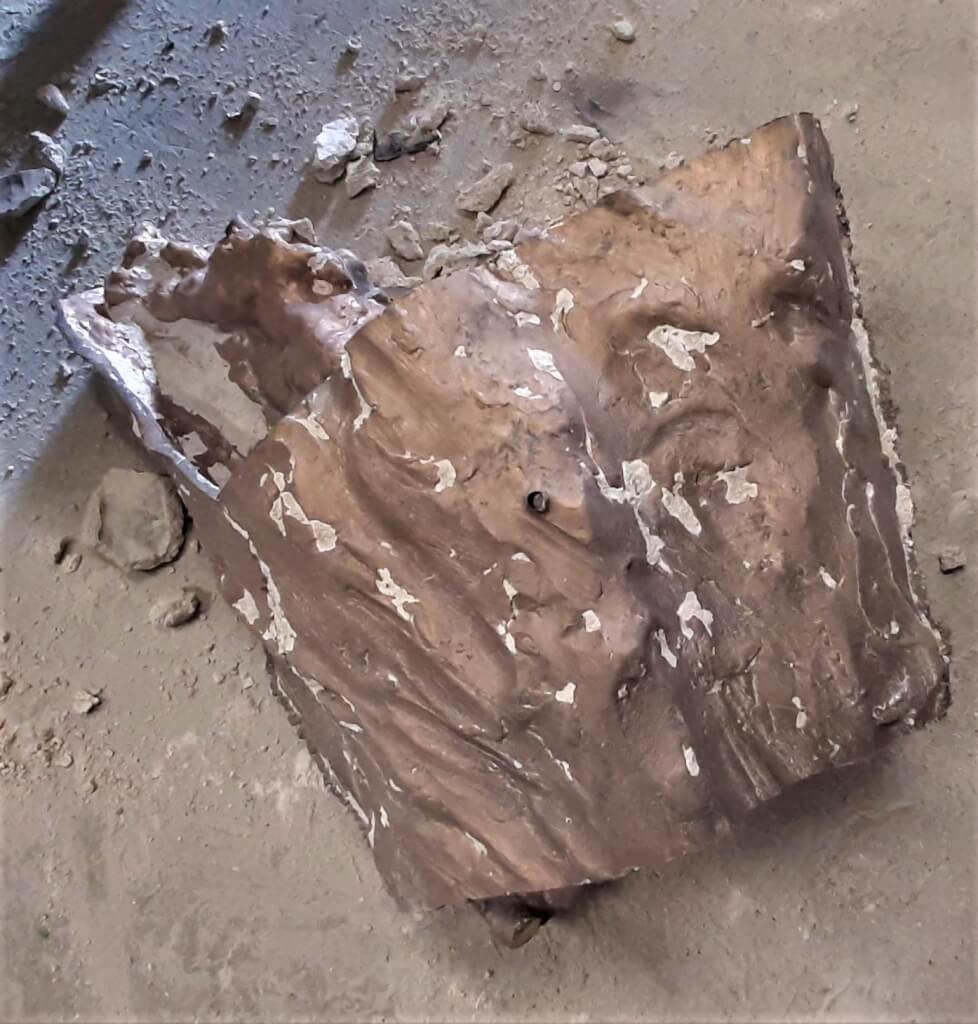
Speak to us of Freedom - this is the casting of the waist of the sculpture. It has just come out of the sandblaster which has removed any last traces of the mould that may have been sticking to it.

You will no doubt recognise this as the same casting from the top of the post, but now looking perfectly clean and ready for assembly.

The next step is to start assembling the individual castings.

See the finished Speak to us of Freedom sculpture here.

Pin It on Pinterest